Premier After Exporting My Video Open the Project Again After Delete
We've all been there before; the network goes downwards, your workstation won't boot, or your NLE of choice crashes every fourth dimension you right-click, and suddenly your workday comes to a screeching halt. Or at the to the lowest degree, Premiere Pro'due south playback gets choppy and stuttery. And if this hasn't happened to yous, it's coming.
Technology, like people, has bad days from time to time. Particularly for us in the postal service-production world, this inevitably seems to happen at the tail-terminate of a projection when everything is due for delivery. That's certainly my feel.
So even though troubleshooting a printer is not something most editors are prepared for, troubleshooting NLE problems is something we should all practice. Because when you're two days from client review, the last thing you need is to waste matter hours browsing old forum posts for technical aid. So let's learn to take charge of our tools.
In today's article, I'll walk through some common issues and solutions in Adobe Premiere Pro and prove you how to set them. If you've ever experienced playback issues, export errors, or irregular performance, hopefully this guide will spare y'all future frustration, and become you on the correct path to NLE artistic harmony.
Before We Start, Restart
It may seem trivial, but sometimes Premiere Pro or your machine only needs a fresh start. Circuitous software like NLEs tie up vast organization resource, including the CPU, memory, storage, GPUs, and network bandwidth, which can naturally cause a performance hit and choppy playback functioning after long editing sessions.
Simply closing and reopening the program can ofttimes alleviate issues because the program "flushes" the processes it may be hung on so initializes them again. And if a plan restart doesn't do the task, a full system restart just might.
And if restarting seems too obvious or simple a solution for the complicated event that yous're suffering from, simply take a few minutes and requite it a try anyway. Accept a minute to sit down back, breathe, and accept a mental reboot of your own. Your encephalon can suffer from inclement playback, too.
Equally the old adage goes, "have you tried turning it off and on again." All editors, whether Mac or PC users, no matter if we're Final Cut, Resolve, Avid, or Premiere jockeys, need to keep this standard practice in mind. It's just the nature of the digital animate being.
Playback Issues
At present you've had a little break (maybe gotten a snack and some tea) while your system rebooted, but you're back at your desk and ready to give everything some other endeavor. So you open up your project, simply alas, the timeline is just non playing dorsum right. What are y'all to do? Well, let's first diagnose the exact nature of the funky playback.
Choppy Playback
Your pollex slams down on the spacebar, the time indicator starts to steadily slide along the timeline, and then ev..er..y…affair starts…to..stutt…er. But don't resign yourself to wasting even more time by waiting around for timeline renders just to watch what you've created. Let's solve this.
Choppy playback in Premiere can exist caused past a number of things, including hardware, effects, media resolution, codecs, sequence settings, or some combination thereof.
Check the Sticker
Beginning things first, double-check with Adobe to make sure your hardware is up to par for running Premiere Pro. Short of ownership a new system, in that location is no solution here if you're estimator does not meet the minimum system requirements.
Turn Furnishings Off
A more than likely cause of choppy playback is that your timeline has also many effects.
Obviously, video furnishings, peculiarly lots of them, tin be difficult for Premiere Pro to process in existent-fourth dimension. Then if y'all simply want to playback your edit sans effects, then Adobe has you lot covered with a single click (or keystroke). You tin can easily turn off all of the effects in your sequence using the "Global FX Mute" push button found in the Program Monitor (look for the stylized "fx").
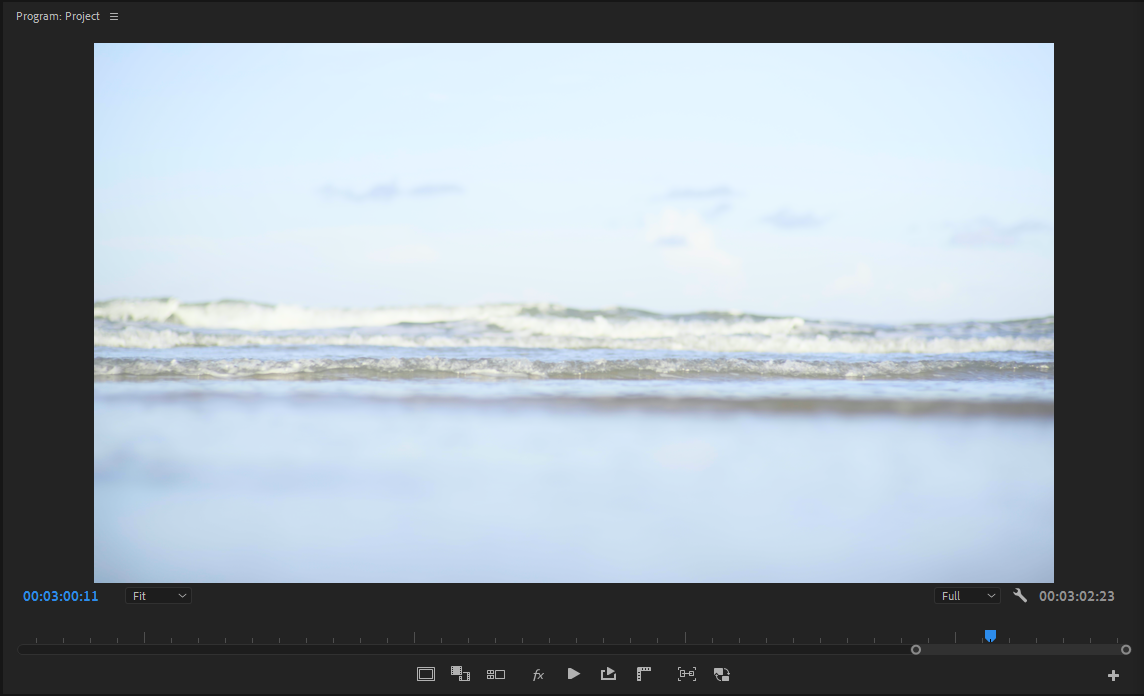
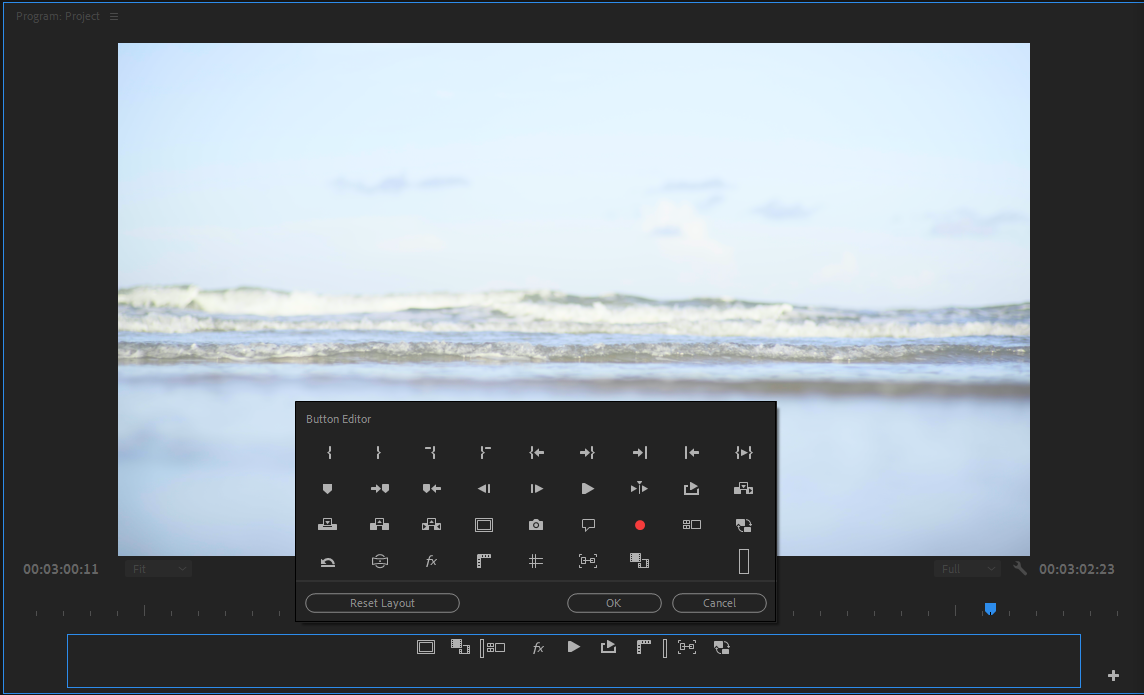
If you don't see this button, it's very easy to add to your UI. Simply click the "+" icon in the lower correct of the window, find the push, and click to add together. As well have the time to explore some of the other buttons in the bill of fare if you lot've never done so before. Alternatively, yous can create a keyboard shortcut.
While you lot're in the Program Monitor, click the wrench icon and find the choice for "High Quality Playback." This option provides a slightly crisper image in the Programme Monitor, though the visual comeback is often negligible without huge screens. That'southward why I recommend unchecking this option, as the performance hit is unremarkably not worth it.
Lower the Resolution and Use Proxies
Now let's talk resolution. If y'all're attempting to cutting 8K raw media on a laptop, there'southward your problem. Very few machines can handle that many pixels smoothly, so don't experience bad if y'all need to use a proxy workflow. In fact, most Hollywood workflows still cutting with proxies, because it's so much faster, especially for remote workflows.
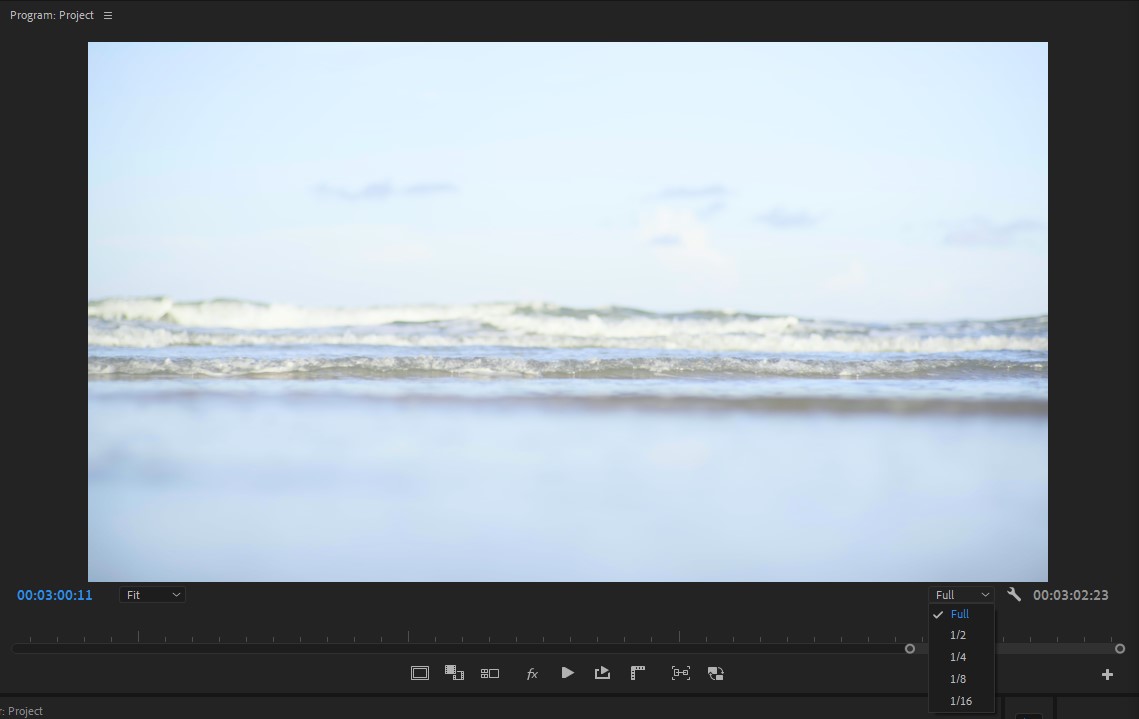
Just sometimes proxies aren't enough, and y'all need to go a step further. You can also save some processing power by lowering your playback resolution in the Program Monitor. The frame size of your current sequence will decide what options are available in the window's dropdown menu, but half or a quarter is generally acceptable for assembling your edit or fine-tuning a scene.
Switch Codecs
Beyond resolution, codecs can be a prime culprit of choppy playback. Some codecs, similar H.264-based files and flavors of .MXF are very processor intensive due to their use of inter-frame compression. These codecs are generally great as a delivery format, but terrible for editing. And so if time permits, transcoding your media to an intra-frame codec similar ProRes can actually speed your editing forth.
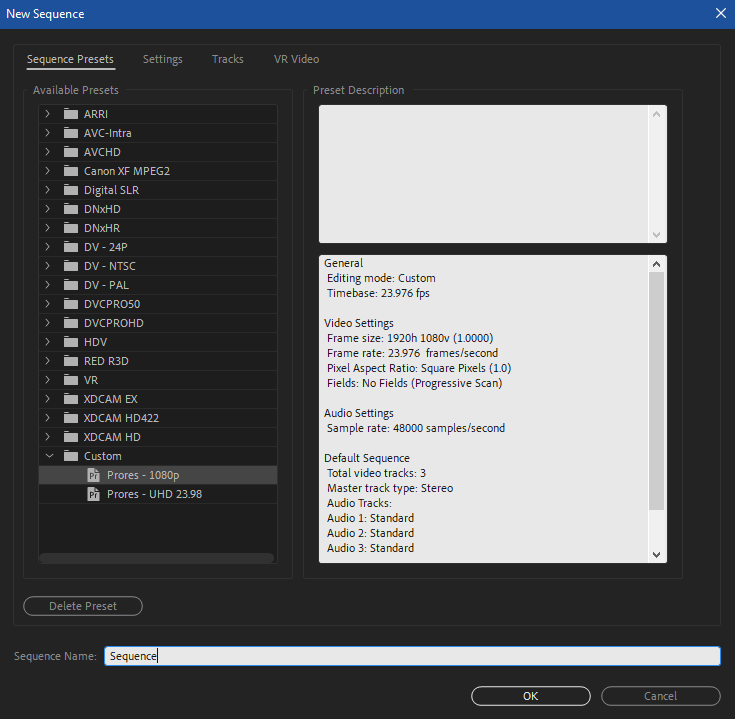
If y'all're guilty of correct-clicking "new sequence from clip" in the project window and and then editing your project in that sequence, then your sequence could be defaulting to some less-than-helpful settings. And so, I encourage you to dig a footling deeper into the sequence settings to make sure y'all're editing media in a quality intra-frame codec, and that your sequence is creating previews files in the same or similar codec.

For instance, I commonly use QuickTime as the preview file format with Apple ProRes 422 as the codec. If you want (and this is a strong recommendation) you can create a custom sequence preset with the settings y'all need, so yous don't have to manually change them for every new sequence.
Clear the Cache
Lastly, choppy playback in Premiere could exist caused by bad render files and/or cache files. If the to a higher place solutions oasis't solved your playback woes, information technology may help to clear these files.
Clearing your sequence's render files is pretty easy. Just open the Sequence dropdown menu on the plan bar and click "Delete Render Files."
With Adobe'southward latest 2022 release, information technology is now much simpler to clear Premiere'southward enshroud. All you have to practice is open up Premiere'south preferences and select the "Media Cache" tab, and so click the new "Delete" button adjacent to "Remove Media Enshroud Files".
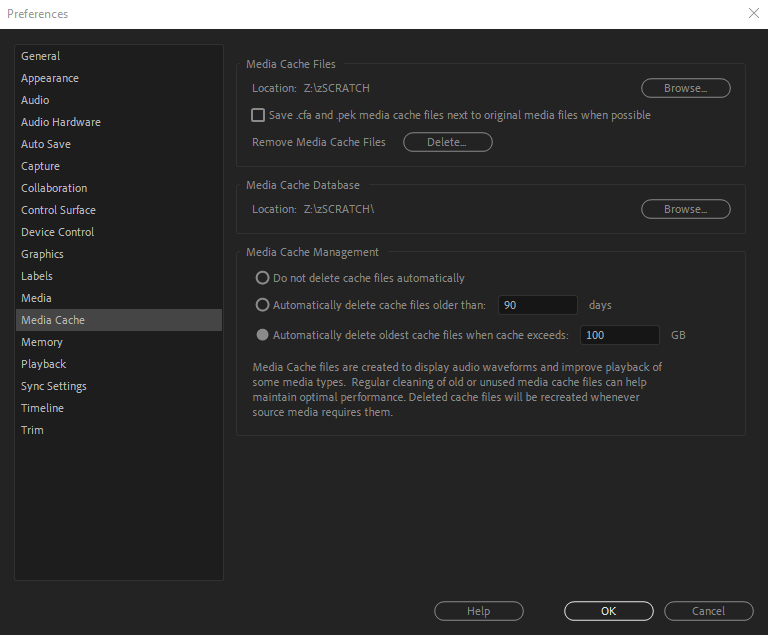
From hither you'll have ii options.
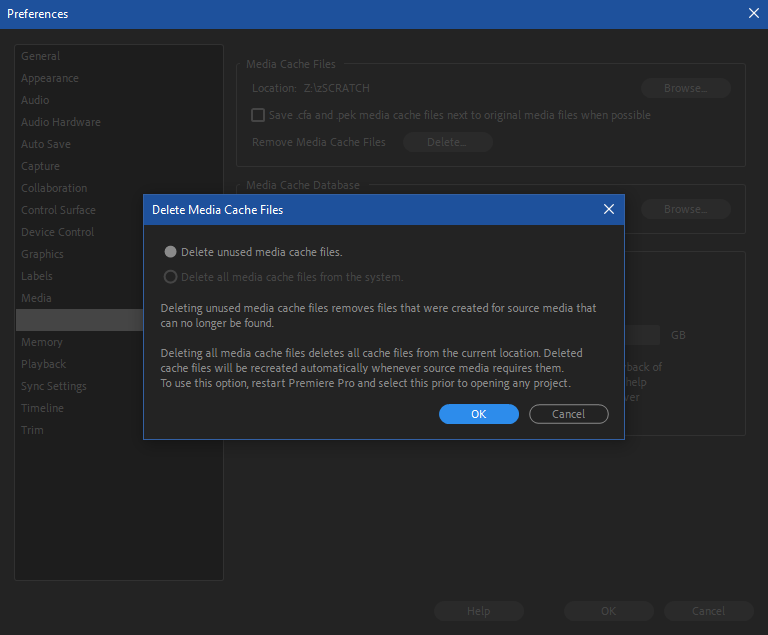
The first, "Delete Unused Media Cache Files" clears all unused cache files in relation to the project you currently accept open. The second choice can simply be selected after restarting Premiere without any projects open. Information technology clears the entire cache.
If you lot prefer the older easily-on approach of clearing the enshroud, take a stroll into your project'due south media cache folder and delete the files manually.
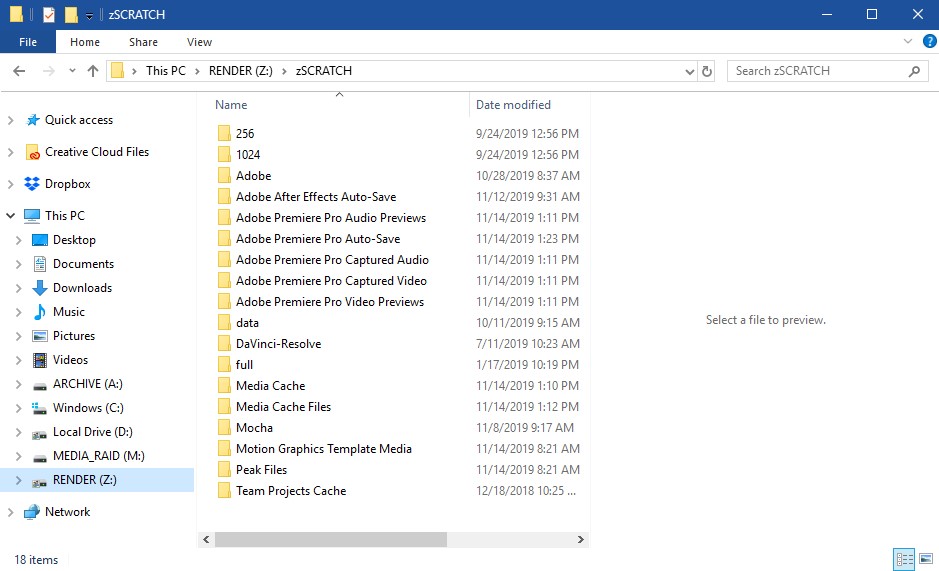
You tin delete the folders "Media Cache" and "Media Cache Files" entirely to really make sure your enshroud clears. Don't worry, Premiere volition rebuild them.
Stuttering Clips
Now let'south imagine you're problem is a little flake dissimilar than choppy playback beyond a whole project.
Sometimes you might feel like a clip y'all've applied a speed ramp to pops or stutters during playback. Or that a sequence with footage of mixed frame rates has sure clips that experience the aforementioned issue.
In both instances, this type of prune-specific stuttering is caused by how Premiere is interpolating the footage, rather than a functioning issue rooted in your hardware.
Interpolation is the method for how Premiere handles playback of a clip at a different framerate than the actual number of frames per second information technology was recorded in. These methods usually involve the creation of "missing" frames necessary for a time-remapped clip or mismatched frame rates.
For instance, if you time remap a clip from 100% to l%, the clip length doubles, only where do those extra frames come from? That's the work of interpolation.
Mixing frame rates in a sequence is oftentimes a necessary evil, particularly in documentary work. Say you plan to deliver in 23.98fps, but 1/iii of your media is 29.97fps. Dropping a 29.97fps clip into a 23.98fps sequence will often generate a slight jitter that'due south most noticeable in clips with motility.
Step back and think about what's happening. Premiere is taking a ane second 29.97fps clip and squeezing it into a 1 second slot in a 23.98fps sequence. That'due south basically vi extra frames per second Premiere has to interpolate. Aside from trying alternative interpolation options, there's not much that can be washed to fix this within of Premiere. Depending on the severity of the jitter, it may exist in your best interest to use a hardware converter, like the Blackmagic Teranex, to conform the clip(s) from 29.97fps to 23.98fps.
Interpolation is also used when time remapping clips. Adobe Premiere offers three interpolation options: frame sampling, frame blending, and optical flow.

Frame sampling duplicates a frame to make upward for missing frames, frame blending blends two frames together to create a new frame, and optical period uses complex math to make a all-time guess at what the missing frame should expect like based off pixel data from inside the image.
Each method offers a different look/effect and can be used to help reduce the popping or stutter of a remapped clip. Unfortunately, that is not plenty, especially when slowing a clip down essentially.
Proper speed ramping commonly forces us to do some pre-planning when shooting video, which sometimes even includes math. Shooting at high frame rates allows editors to ho-hum down footage in post and helps avert the stuttery look. Understandably, in that location are many situations when the exact speed of a time remapped clip won't be determined until in the edit, but you'll need to do your best if y'all're involved with production of the projection.
Pretend we're working on a project, planning to deliver in 24fps and shooting in 60fps. For our clips to play dorsum buttery-smoothen in a 24fps sequence, we need to know the precise speed to play back each of the 60fps clips and so that in that location is just ane frame for every 24th of a second. So, 24 frames per second of playback divided by 60 frames per 2d of footage, leaves u.s. with 40% speed. That ways slowing each 60fps clip down to twoscore% speed will turn those clips into smooth, tedious-motion 24fps clips.
If math isn't your matter or you lot just want Premiere to do the piece of work, yous can also select the 60fps clips in the Projection panel, right click "Modify" and under the "Interpret Footage" tab select "Assume this frame rate:" and blazon 24fps.
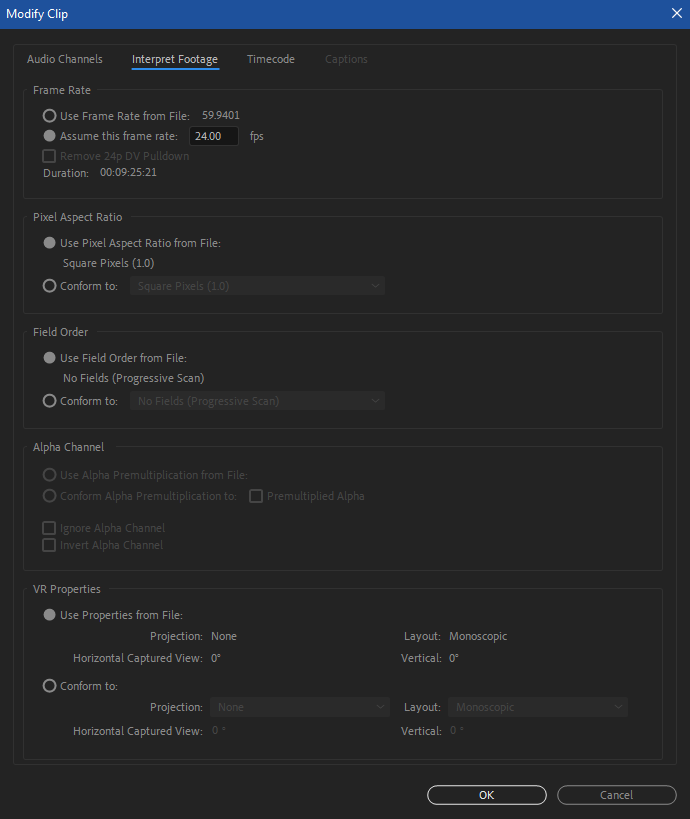
Once you click ok, Premiere will do all the math for you and every clip in the sequence will playback at 24fps. Note you lot should do this prior to calculation clips to whatsoever timelines as this evidently changes the clip's timing.
Irksome Preview Rendering
Despite our best efforts, rendering is sometimes the only mode to play back a sequence or parts of a sequence in existent-fourth dimension. And depending on what'southward going on in a sequence, this can also take a while. Outside of the corporeality of sheer processing power bachelor to your organisation, the resolution, codec, and corporeality of effects in your sequence weigh nearly heavily on this effect.
One option that may save time is to adjust the video preview settings of your sequence. In your Sequence Settings, the option to change preview size only affects the previews you're seeing within of Premiere and not the last consign.
And then if your sequence frame size is 3840×2160, setting the video preview size to 960×540 drastically reduces the size of the preview files Premiere has to create, which obviously means they take less time. And unless you're relying on dedicated preview monitor, you may not notice a huge quality difference in your Program Monitor.
No Video Preview In Program Monitor
If you've been editing along swimmingly and of a sudden the Program Monitor just shows black while playing back a sequence there'due south a skillful chance the GPU or a bad render/preview file is to blame.
GPU issues sometimes occur when using CUDA or Metal-based renderers, and and then about often happen when stacking effects on loftier resolution video. As powerful as these cards are, they sometimes hit a snag with intensive workflows.
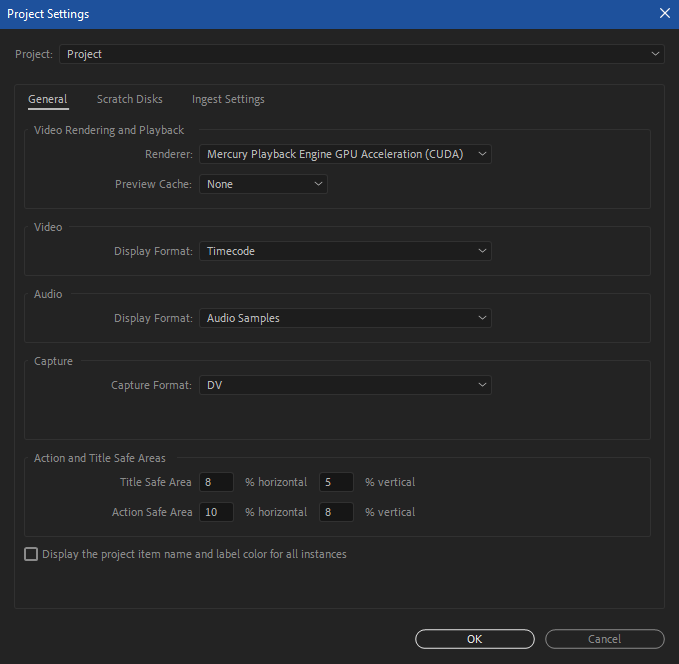
Ordinarily a program or estimator restart addresses the effect, but occasionally they can persist when a certain part of a sequence with heavy furnishings volition always cause the Program Monitor to go blackness. If you experience this endeavor changing the renderer in your project settings (File > Projection Settings > General…) to use Software-Merely rendering. This option takes your GPU out of the equation.
This will nearly certainly crusade a noticeable performance hitting, just you can work like this in a compression. Yous can also mark In/Out on the troubled section of video, return information technology In to Out, and and then export that section of your sequence using preview files in a proficient codec. By cutting this "pre-rendered" chunk back into your sequence on top of the layers that were used to create information technology, you can continue your GPU rendering on without the monitor going blackness.
Some other choice to prepare lack of video in the Programme Monitor is to try immigration the renders/preview cache like nosotros explored earlier.
Audio Won't Play or Drops Out
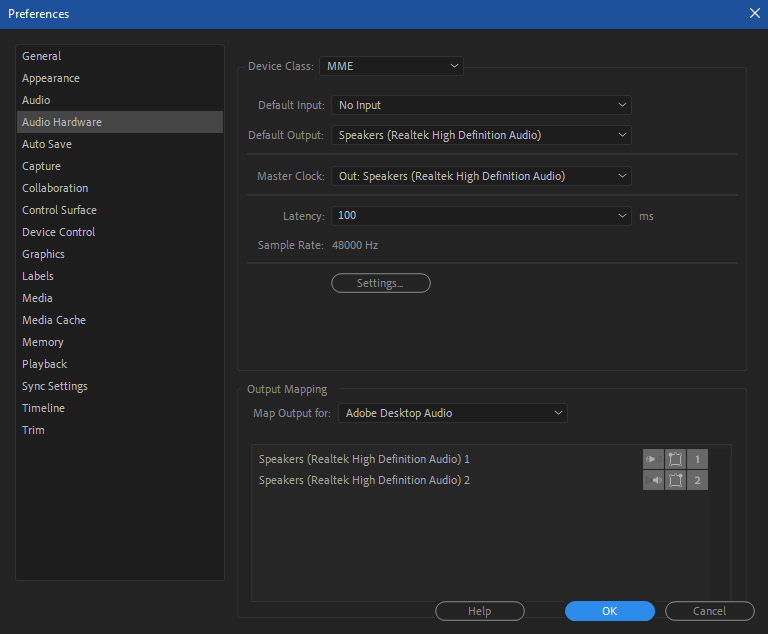
Chances are that, if sound playback is choppy or not playing at all but Premiere otherwise seems to be working fine, then your hardware settings take changed. These settings are system dependent and tin can be adjusted in Preferences > Audio Hardware. Pay conscientious attending to the Default Output option as it isn't necessarily the same as the system's default output.
If audio is dropping out equally you playback a sequence, that could be due to latency or using compressed audio.
Latency is the brusque delay that's experienced when an sound indicate is processed by a calculator and then output to the speakers. Y'all can adjust latency in the Audio Hardware preferences, so requite that a try if necessary. Smaller values offer lower latency, but higher values can sometimes alleviate sound dropouts.
Premiere can generally handle whatever y'all throw at it, but some systems may occasionally experience audio dropouts with compressed sound files, like MP3s. The best way to avoid this is to either use an uncompressed audio file, like .WAV or .AIF, which are easy to convert to.
Common Export Issues
At present let's imagine another problem. Y'all've finished editing your project, but you can't get the blasted thing to consign correctly. Let's accept a wait.
Mistake Messages Defined
Sometimes Premiere volition do yous a favor and spit out an error code about an effect. These messages practise a decent, albeit still frustratingly inconsistent, job of titling errors in a meaningful mode (at to the lowest degree for consign/render problems).
If y'all don't know what an fault really means, just consult the listing to get to the bottom of it.
But permit'southward assume you didn't get a articulate error bulletin. Here are some common causes for export issues in Premiere Pro
The Usual Suspects
Equally nosotros've already covered, the virtually common performance issues circumduct around codecs, GPU processing, write locations, furnishings, and corrupt media. Likewise, consign errors involve the same sorts of things. We've already covered codecs pretty well, so let's bound back to GPUs.
GPU Rendering
If you think the GPU is causing your exports to fail (similar information technology can with render previews), then endeavor disabling hardware render settings in your projection'southward render setting. Over again, software-only rendering will exist slower, but it may allow you to export the sequence without failure.
Write Location and Permissions
Write location bug generally stem from non having enough space available on a bulldoze to write to the file. Only they can also involve permission mismatches. Obviously, the uncomplicated solution to the former is just to make sure you lot have enough space available at the write location prior to exporting.
Permission problems tin can be particularly prevalent in networked environments. (They tin can popular up on solo machines likewise.) They tin be a real hurting to solve if you've never encountered them before. The exact cause and solution of these problems is dependent on a number of factors, and are a fleck more granular than nosotros'll cover here, but there are lots of resources out there for solving common Mac and Windows permissions issues.
Troublesome Effects, Again
Besides many effects can requite us a lot more grief beyond merely inclement playback. If your exports are failing, it's possible at that place's a troublesome effect hiding in your timeline.
It'south easy to exam this. Plough on the "Global FX Mute" option and try to export your sequence. If it exports fine without effects, so there's a problematic consequence or corrupt piece of media amongst your clips.
Only at the end of the day, y'all probably need the effects on your timeline. So yous need to find it and fix it.
So disable "Global FX Mute," and mark an in betoken at the offset of the sequence and an out bespeak in the middle of the timeline. Now try to export that portion.
If it works, then you know the troublesome outcome is non in the first half of your sequence. At present test the second half. And so brand an in point in the middle of your sequence and an out point at the finish. If it fails to export here, you know the bad effect is in that one-half (though you probably already knew that since the first half exported fine, this just confirms it).
Now it's time to hone in on the bad event, then repeat this procedure again past exporting half of the failed in/out points. If information technology exports fine, the bad effect is in the final quarter of your timeline, and if information technology fails, you're closer to finding it. You get the thought.
In one case y'all've found the problematic clip or outcome, render information technology and export it individually, both with and without effects. In one case yous have a rendered file of the troublesome clip, simply import it into your timeline and insert it above the offending prune (which you lot may need to disable). Now you should be able to export your timeline without any issues.
Nuclear Options
Unfortunately, there are times when engineering will get the best of us and nosotros are left with uncomfortable choices.
We're fortunate as video editors that this isn't life and death – just lost fourth dimension and productivity. Only it's a hard choice all the same if you lot're approaching deadline and Premiere still has functioning problems.
For times such every bit these, here are the last, nuclear options to consider.
Clear Premiere Pro's Preferences And Plugins
Resetting Premiere Pro back to its original state may be the cure for your ills. Of course, trashing all your preferences and customizations is painful, just information technology may exist your simply option.
But before y'all reset Premiere Pro, first attempt immigration the plugin cache. Plugins are great, simply sometimes they don't play nice with the latest update. Or they develop bugs of their own. To articulate their enshroud, concord Shift+Alt (Windows) or Shift+Option (Mac) while launching Premiere until the splash screen appears. And if this doesn't work, effort removing and re-adding plugins to Premiere.
But if that still doesn't work, it's time to reset Premiere'south preferences entirely. Hold Alt (Windows) or Selection (Mac) while launching Premiere until the splash screen appears. Prayers are optional in this step.
When All Else Fails
If none of the above has solved your Premiere Pro playback issues, I apologize and mourn your situation. At this point, your but selection may be to uninstall and reinstall Premiere Pro. It sucks, but sometimes years-old installs need a fresh start. Brand sure all your projects are saved and backed up externally. Then use the Creative Cloud desktop app to remove and perform a clean install of Premiere Pro.
If subsequently this last stop you're yet having performance bugs, it'southward likely you accept a deeper hardware or workflow result. It's time to telephone call in an expert to expect at your situation. Godspeed.
The Route to Recovery
Solving technical problems can exist a painful process. It'south confusing, disruptive, and sometimes mind-numbingly slow. When a client or producer is animate downward your neck to terminate a project, it's massively stressful.
Just at the end of the day, information technology'southward our job to continue our tools in shipshape. We need to take charge of our workflows and equip ourselves with the cognition to fix our own problems. If we can do that, we'll feel more comfortable with our technology and more than confident in our abilities. Plus, showing off a little technical prowess can definitely print clients and coworkers. And that tin inspire them to work with you downward the road.
At present you should be set to tackle some of the virtually common problems you're likely to face in Premiere Pro. And then get along and conquer those workflow bugs!
Inclement playback isn't the but event with Premiere Pro. Are there any common issues we left out? Let us know in the comments, and share your solutions with the customs. We beloved hearing from our readers, and learning from your incredible creativity and experience.
grandberrysity1985.blogspot.com
Source: https://blog.frame.io/2019/11/18/diagnosing-premiere-pro-problems-choppy-playback/
0 Response to "Premier After Exporting My Video Open the Project Again After Delete"
Post a Comment